How to attach fold over elastic
When attaching elastic you'll soon become a dab hand at holding the elastic at a certain tension and sewing in a straight line.
A wonky applied elastic can take your design from wa-hey to wa-nay.
It is like anything, practise, practise and practise. I bet if you looked at the first garment you made to your latest one you will see how far you have come.
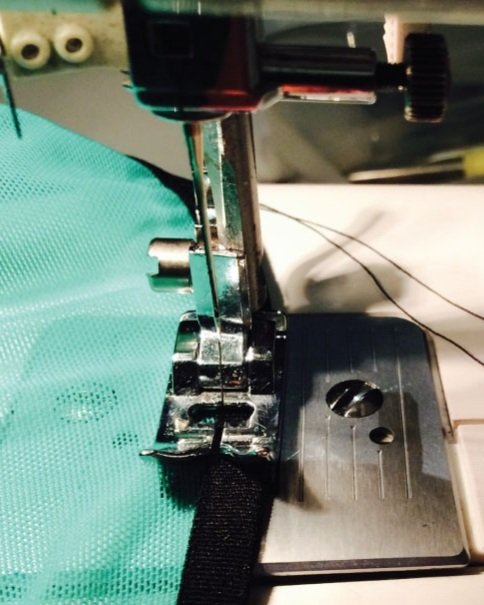
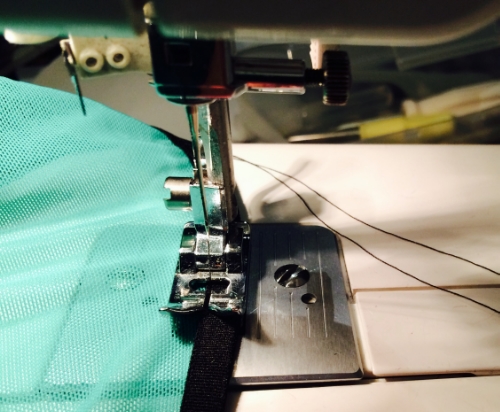
One thing I often see with people when they are starting out is that they don't make use of the straight guides they have available to themselves on their machine. Mainly the sewing foot.
So apologies if this next bit seems glaringly obvious to you seasoned sewers but I'm about to go back to basics.
Attaching fold over elastic is a great way to start when sewing, as it only takes one application (you don't have to attach the elastic then turn and secure it). and it hide multitude of sins and raw edges, however if the sewing ends up wavering from edge to edge, the fabric can come out of the elastic.
If you're starting out, practise on straight edges then curves. Practise using different parts of the foot as a guide to see where the stitching ends up, make a note of which part of the foot you will use, it's so easy to forget especially if you come back to this style a few weeks later.
I personally use the edge of the inside of the foot that isn't on the elastic. (see image).
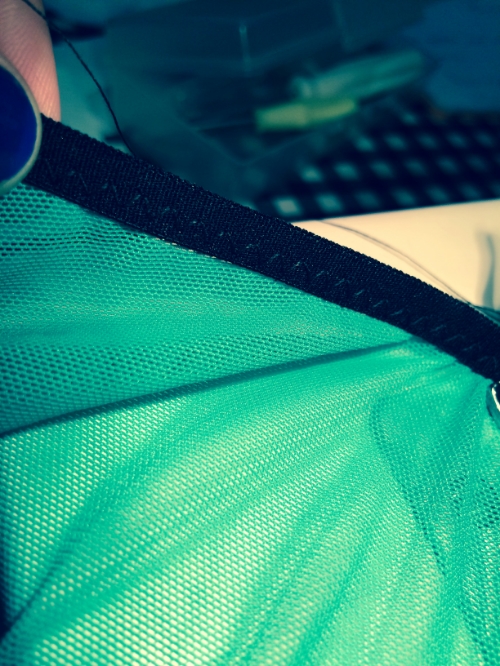
With the elastic open lay the fabric to half way point of the elastic - this is natural crease of the fabric that it folds on. Then fold over the elastic concealing the edge of the fabric. Pin it if necessary to hold it all in place. Then with your chosen edge of your foot, line it up and sew, carefully sandwiching the fabric in as you sew.
You do not need to sew with the elastic open to attach and then re-sew once the elastic is folded over, you can do it one procedure. In the long run you save time and then both sides look the same and look industry standard.